728x90
7.10 이상 버전에서 라이선스 이슈 왈가왈부가 많아 apache2 라이선스 예하의 7.10 으로 올림
MasterNode 3대에 DataNode를 2대만 설정했습니다. MasterNode는 무조건 3대 이상해야 되더라구요.. 2대로는 고가용성 불가..
서버 OS : CentOS 7버전
Hardware Requirement : https://www.elastic.co/guide/en/cloud-enterprise/current/ece-hardware-prereq.html
1. ElasticSearch 서버 인스톨
※ root 유저가 아닌 일반계정으로 install 해야 합니다.
$ wget https://artifacts.elastic.co/downloads/elasticsearch/elasticsearch-7.10.0-linux-x86_64.tar.gz
$ tar -zxvf elasticsearch-7.10.0-linux-x86_64.tar.gz
$ mv elasticsearch-7.10.0 elasticsearch
2. start/stop 스크립트 만들기
# vi start-es.sh
-------------------------------------------------------------------------
#!/bin/bash
su - es-user -c "/home/es-user/elasticsearch/bin/elasticsearch -d"
# vi stop-es.sh
---------------------------------------------
#!/bin/bash
echo "Kill Elastic Process All"
ELASTIC_PID=$(/bin/ps -fu es-user| grep elastic | grep -v grep | awk '{print $2}')
echo "Process ID is"
echo ${ELASTIC_PID}
/bin/kill -9 $ELASTIC_PID
3. 서버 설정
# vi $ES_HOME/config/elasticsearch.yml1) Master Node
cluster.name: es-test
node.name: ${HOSTNAME}
node.master: true
node.data: true
path.data: /path/to/data
path.logs: /path/to/logs
network.host: 192.168.122.17
discovery.seed_hosts: ["192.168.122.16","192.168.122.17","192.168.122.18"]
cluster.initial_master_nodes: ["192.168.122.16","192.168.122.17","192.168.122.18"]
2) Slave Node 2개
cluster.name: es-test
node.name: ${HOSTNAME}
node.master: true
node.data: true
path.data: /path/to/data
path.logs: /path/to/logs
network.host: 192.168.122.16
discovery.seed_hosts: ["192.168.122.16","192.168.122.17","192.168.122.18"]
cluster.initial_master_nodes: ["192.168.122.16","192.168.122.17","192.168.122.18"]
cluster.name: es-test
node.name: ${HOSTNAME}
node.master: true
node.data: false
path.data: /path/to/data
path.logs: /path/to/logs
network.host: 192.168.122.18
discovery.seed_hosts: ["192.168.122.16","192.168.122.17","192.168.122.18"]
cluster.initial_master_nodes: ["192.168.122.16","192.168.122.17","192.168.122.18"]
4. 서비스 및 클러스터 점검
# curl http://192.168.122.16:9200
# curl http://192.168.122.17:9200
# curl http://192.168.122.18:9200

# curl http://192.168.122.16:9200/_cluster/health?pretty
# curl http://192.168.122.17:9200/_cluster/health?pretty
# curl http://192.168.122.18:9200/_cluster/health?pretty
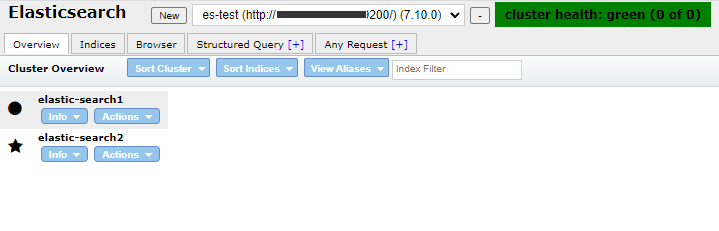
5. Chrome Extension을 이용하여 UI로 관리화면 접속
Multi Elasticsearch Head
Multi Elasticsearch Head
chrome.google.com
※ max file descriptors [4096] for elasticsearch process is too low 에러 발생시
# vi /etc/security/limits.conf
---------------------------------
root    soft    nofile  65535
root    hard    nofile  65535
es-user soft    nofile  65535
es-user hard    nofile  65535
※ max virtual memory areas vm.max_map_count [65530] is too low 에러 발생시
# vi /etc/sysctl.conf
-----------------------------------
vm.max_map_count=262144
그리고 재부팅
'PaaS > Data' 카테고리의 다른 글
| Filebeat와 Elastic Search 연동 (0) | 2022.07.15 |
|---|---|
| Kibana 7.10 올리기 및 Elastic Search 연동 (0) | 2022.07.15 |
| Hadoop 이란? (0) | 2022.07.04 |
| (NoSQL) MongoDB 구성요소 (0) | 2022.04.15 |
| (RDBMS) 인덱스에 대해서 (0) | 2022.01.25 |